Description:
Introducing our Document Browser for Sharepoint, a powerful tool to seamlessly integrate and enhance your Dataverse data with Document Browser for SharePoint. Unlock the full potential of your records by effortlessly accessing and managing related documents. Here’s what our tool brings to the table:
Streamlined Document Retrieval:
Effortlessly link specific documents associated with the current Dynamics record or any related record. Our Document Browser for SharePoint ensures that your documents are easily accessible within the Dynamics environment, providing a seamless workflow. Upon selecting a file, the tool populates the file’s URL into the associated field on the form so users can conveniently copy the URL and share it via email or Teams.
Drag-and-Drop Uploads:
Experience unparalleled convenience with our drag-and-drop feature for uploading multiple documents to SharePoint. Save time and simplify the document management process by effortlessly transferring files directly into your SharePoint repository.
Intuitive File Selection:
Selecting files has never been easier. Our tool presents a user-friendly list of documents, allowing you to choose the relevant files effortlessly and traverse through complex folder structures. Enhance your document management efficiency with a simple and intuitive file selection process.
User-Friendly Interface:
Our tool boasts an intuitive and user-friendly interface, making document management a breeze. Navigate effortlessly through documents, upload with ease, and generate URLs in a few simple steps, all within the Dynamics environment.
Experience the power of streamlined SharePoint documents directly within Dynamics. Elevate your team’s efficiency, enhance collaboration, and simplify the way your business handles documents with our Sharepoint Document Browser. Try it today and redefine the way you interact with your Dynamics records and associated documents!
Prerequiste of using Document Browser for SharePoint PCF
Create a custom text field in the entity where this feature needs to be used. Learn how to create column using Power Apps when adding a new column.
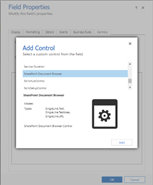
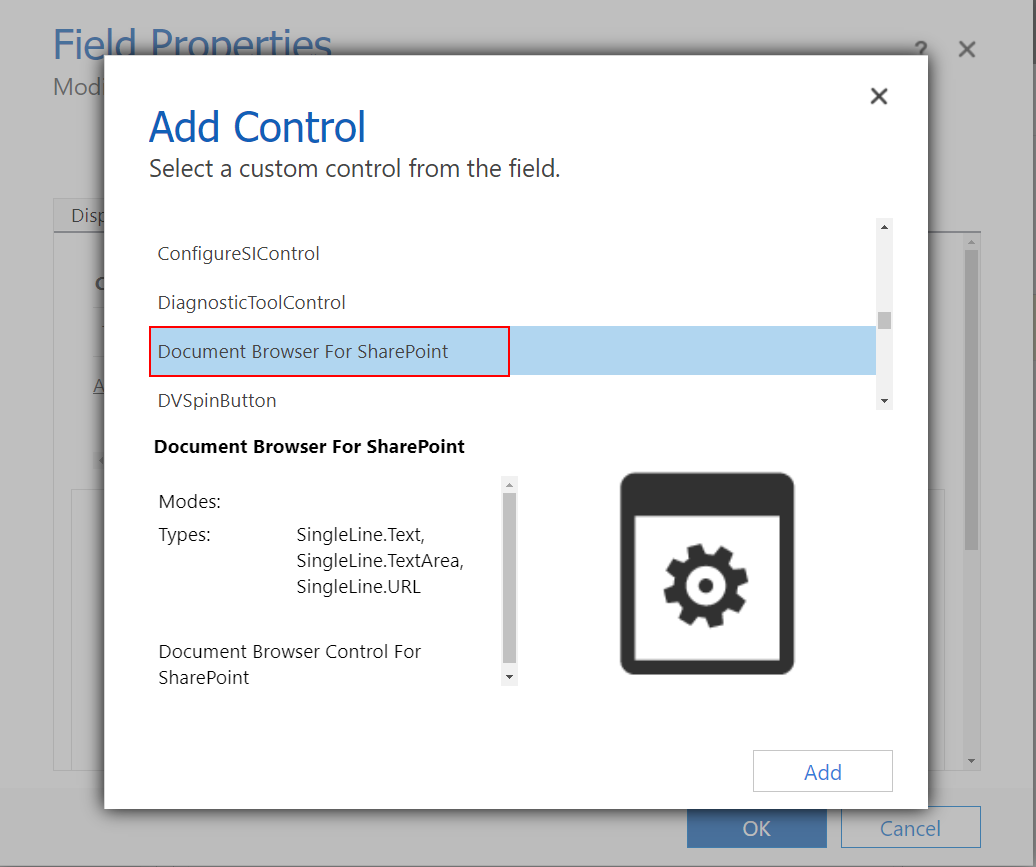
Open the form editor to add the customer field onto the form. Once the field is selected on the form, navigate to properties to add the SharePoint Document Browser component.
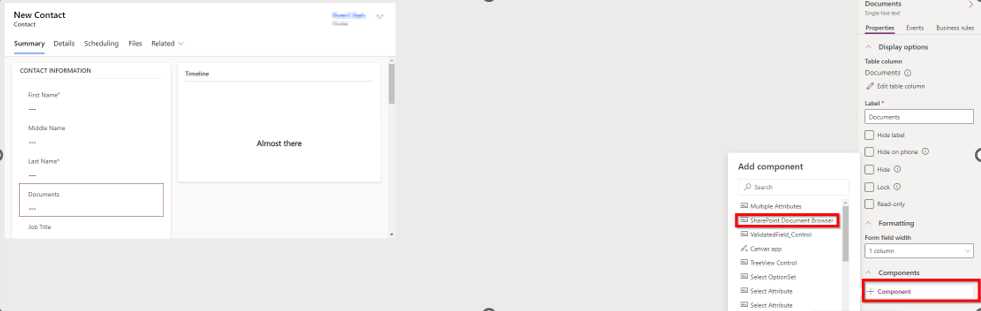
Save and publish the form.
Document Title Preview
- The document title now provides a preview of the document or image.
- This allows users to quickly view the content, improving efficiency.
How to Use It:
- Hover over a document title in Document Browser for SharePoint window.
- A preview of a document or image will be shown.
Document Title Preview
- You can now move attachments from a record Notes to SharePoint.
- This helps reduce storage usage in Dataverse while keeping documents easily accessible.
Before using this feature, open the model-driven app “Document Browser for SharePoint” from the “Document Browser for SharePoint” solution or from the apps section.
- Click ‘New’ on the Configurations entity and fill out the details to enable “Move to SharePoint” button in the form ribbon.

-
- Please Select Entity – Select the entity where you need this button enabled
- Please select Form – Select the form the drop down to select the form
- Save and Close
How to Use it:
- Open the record that contains the attachment in Notes.
- Select the “Move to SharePoint” option.
- A notification “Attachments moved successfully!” will appear
Upload documents using drag/drop
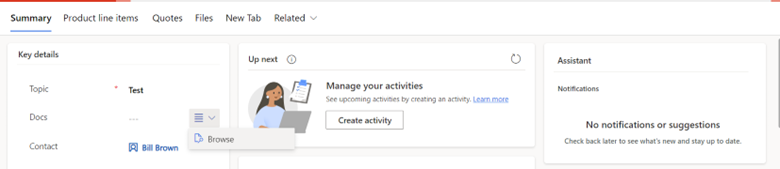
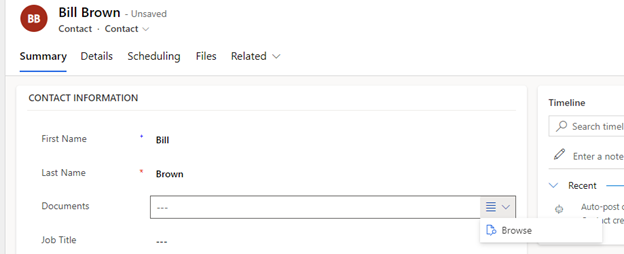
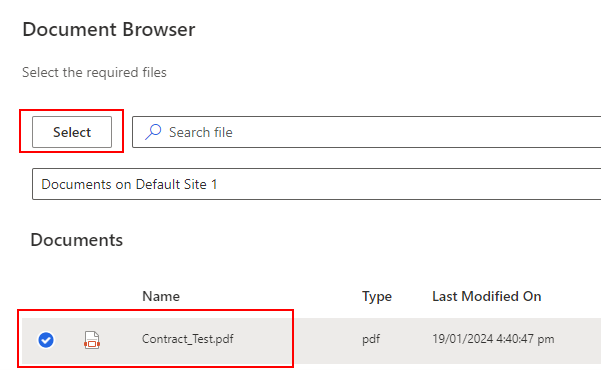
- Open the record where the custom field is created, then click on the field and select ‘Browse’.
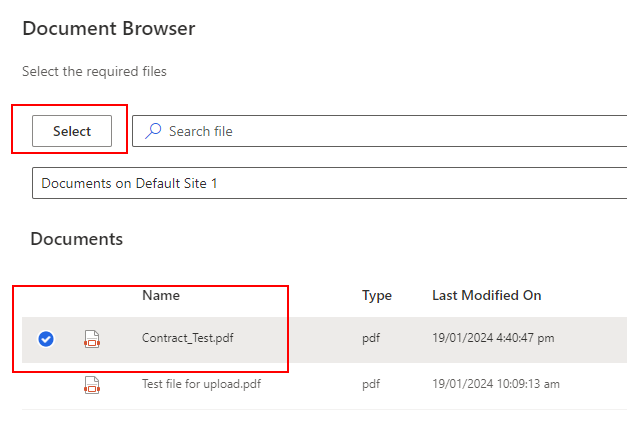
- Drag and drop the files onto the ‘Document Browser’ pop-up window.
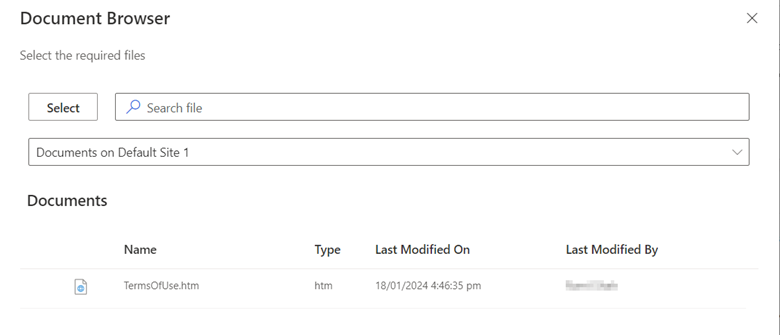
- Select the checkbox and click ‘Select’ to choose the document as the main document to be shown in the field.
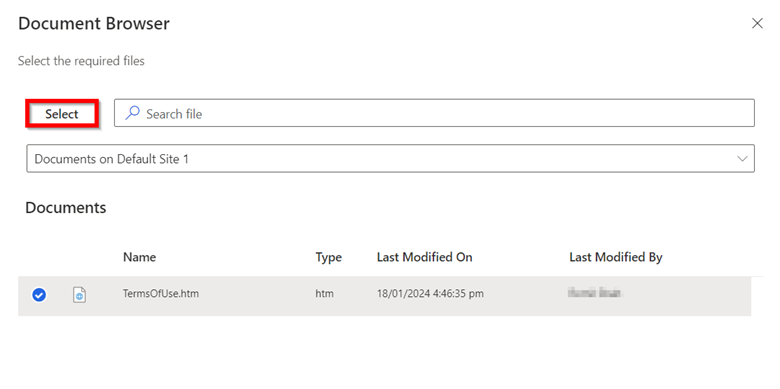
- Click the ‘Save’ button to save the record.
![]()
Access document from a related record
Follow the steps provided in the prerequisite instructions.
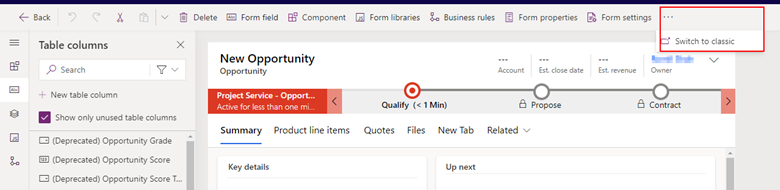
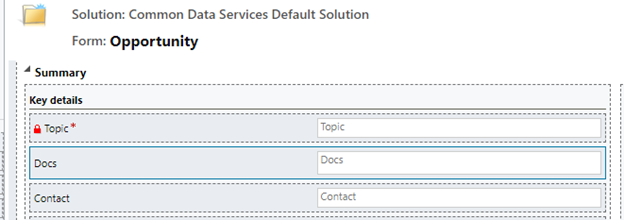
- Navigate to the ‘Classic Editor’ from the ‘Form Editor’ for the Contacts entity.
- Double-click on the custom field to open the field properties tab.
Add the SharePoint browser control as shown in the screenshot below:
- Document Browser for Sharepoint
- Click on the ‘Related Entity Lookup’ icon and select the value as shown below.
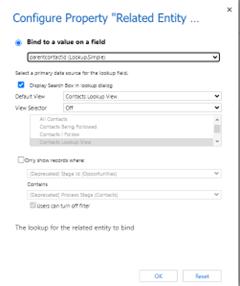
- Press ‘OK’ and then click ‘Save’ and ‘Publish’.
- Go to make.powerapps.com, navigate to the solution where all the changes are made, and click ‘Publish All Customizations’.

- Open the app, navigate to the ‘Contacts’ entity where the SharePoint Document Browser is configured, open the record, and click ‘Browse’ on the custom text field.
- Upload the document by dragging and dropping it, then select the document.
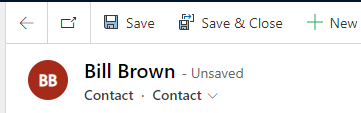
- Save and close the record.
- Create a new opportunity record and select the contact for which the document was uploaded in the previous step.

- Open the Document Browser for Sharepointby clicking on the browse button.

- You will now see the documents that were uploaded on the contact record using Document Browser for Sharepoint, which is now available on the opportunity record. Simply check the checkbox and click ‘Select’.
- Save the record.
- You can now verify the document by clicing on the link to open the document or copy the URL and open it in any other browser.

Sending the attachment via Email
Pre-requisites:
Before proceeding, ensure you have completed the following steps to enable the email attachment feature.
- Create an app registration on the Azure Portal
- Client ID
- Application ID
Create an App Registration on Azure Portal:
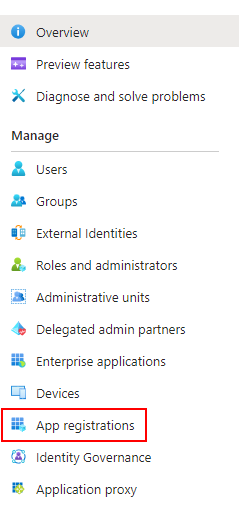
- Go to https://portal.azure.com/, search for Microsoft Entra ID (previously known as Azure Active Directory)
- Click ‘App Registration’ from the left side menu
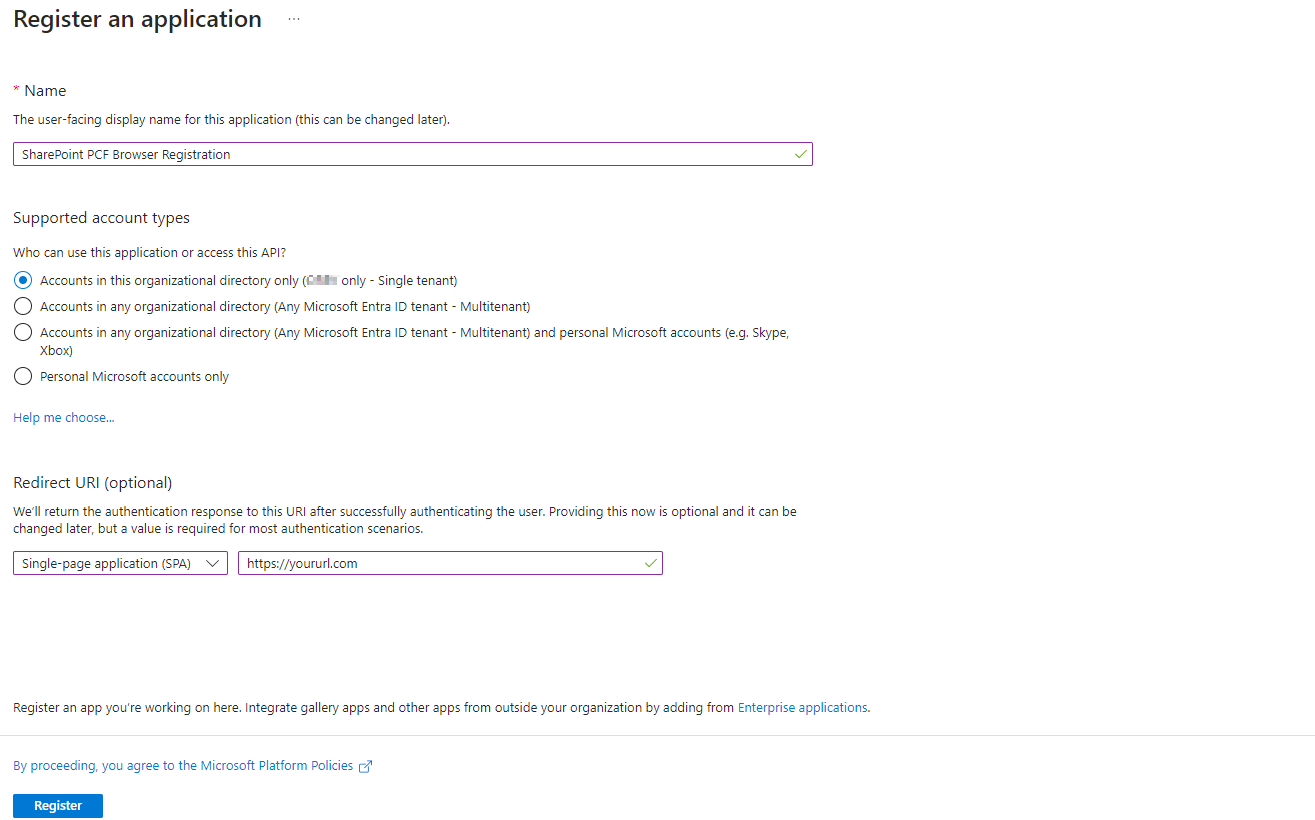
- Click ‘New Rigstration’ from the main menu.

- Enter details as shown in below screenshot, and click ‘Register’.
- Name
- Select the first option (Accounts in this organizational directory only) option
- Select Single-page application under Redirect URI and provide the URI of the app
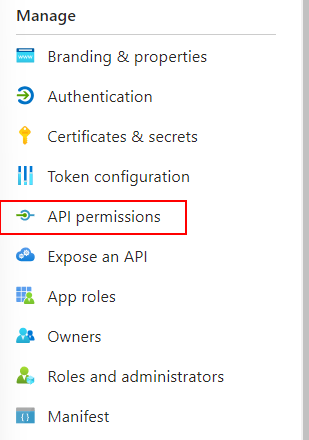
- Go to ‘API permissions’ from the left side menu.
- Click on ‘Add a permission’ and select ‘SharePoint from the list.
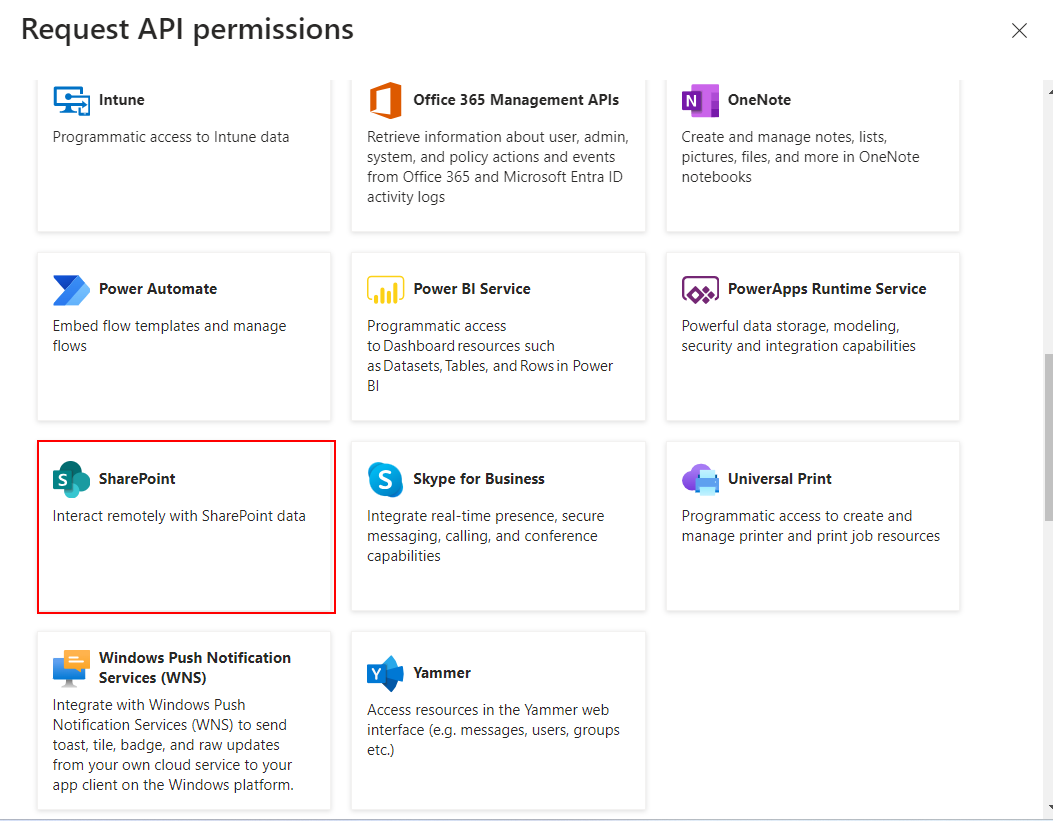
- Select ‘Delegated permissions’, expand ‘AllSites’ and tick the checkbox for ‘AllSites.Read’ and press ‘Add Permissions’.

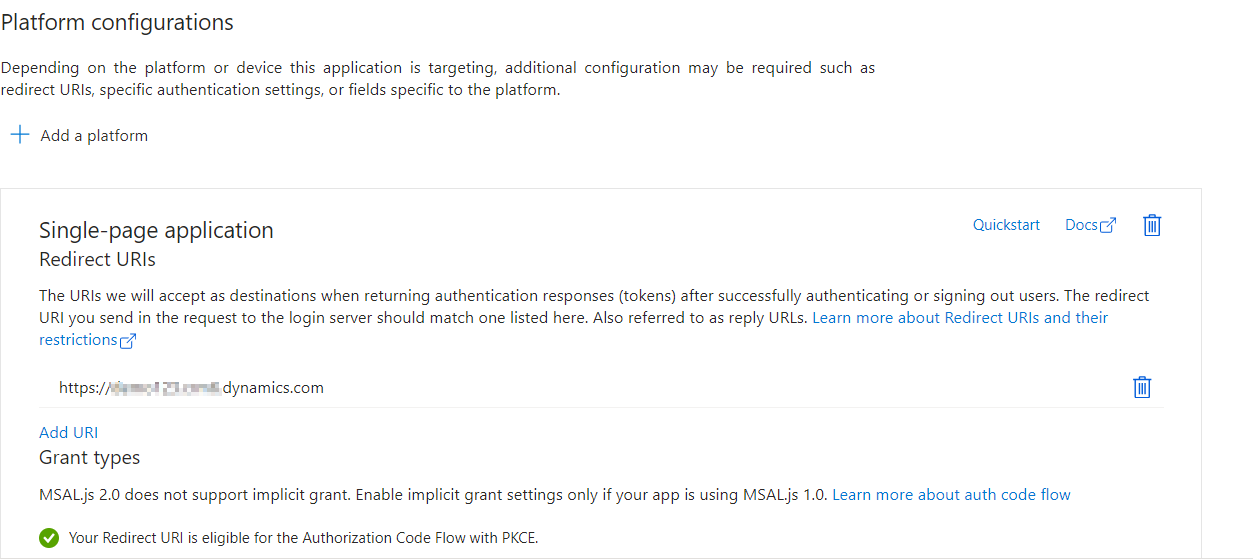
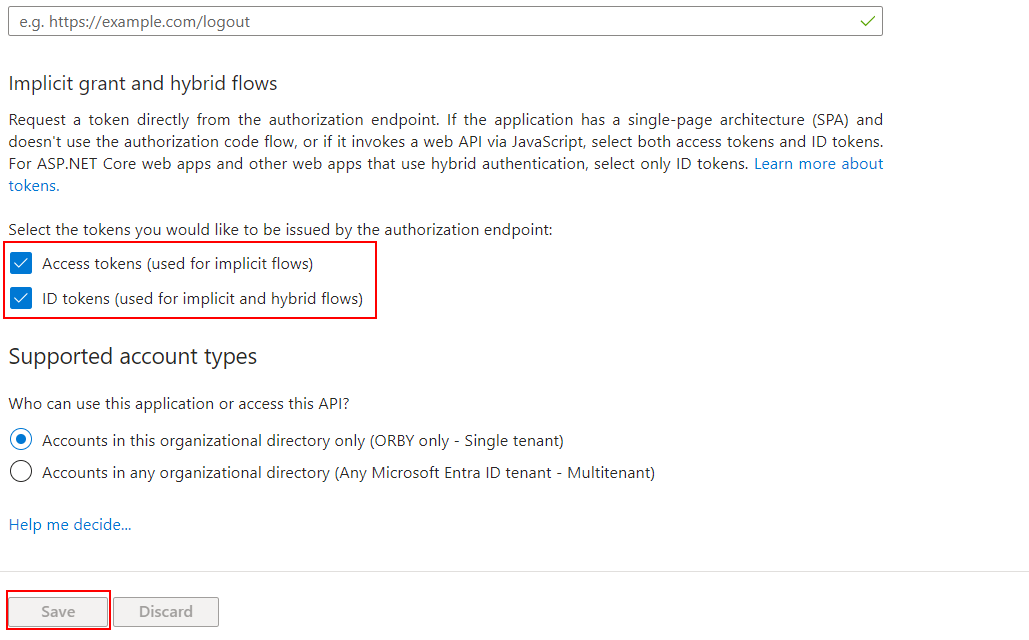
- Click on ‘Authentication’ from left menu and verify the URL of the app is correct, and select both the options under ‘Implicit grant and hybrid flows’. Hit the ‘Save’ button.
- Copy the ‘Application (client) ID’ and ‘Directory (tenant) ID’ from the ‘Overview’ tab as it will needed for the next steps.

That’s it! The app has been registered successfully on the Azure Portal.
Configuration of Document Browser for Sharepoint PCF Control on the Form:
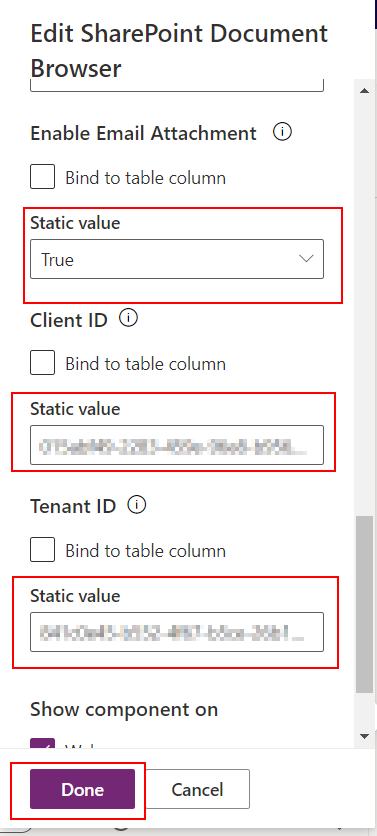
- Open the form editor and select the custom field where the Sharepoint Document Broser component is to be added.
- Scroll and locate the ‘Enable Email Attachment’ option.
- Enter following details:
- Set the ‘Static Value’ to ‘True’
- Paste the preiouslycopied ‘Applicantion (client) ID’ and ‘Directory (tenant) ID’
- Click ‘Done’ and then ‘Save and publish’ to apply the changes to the form.
Sending Email with Attachment:
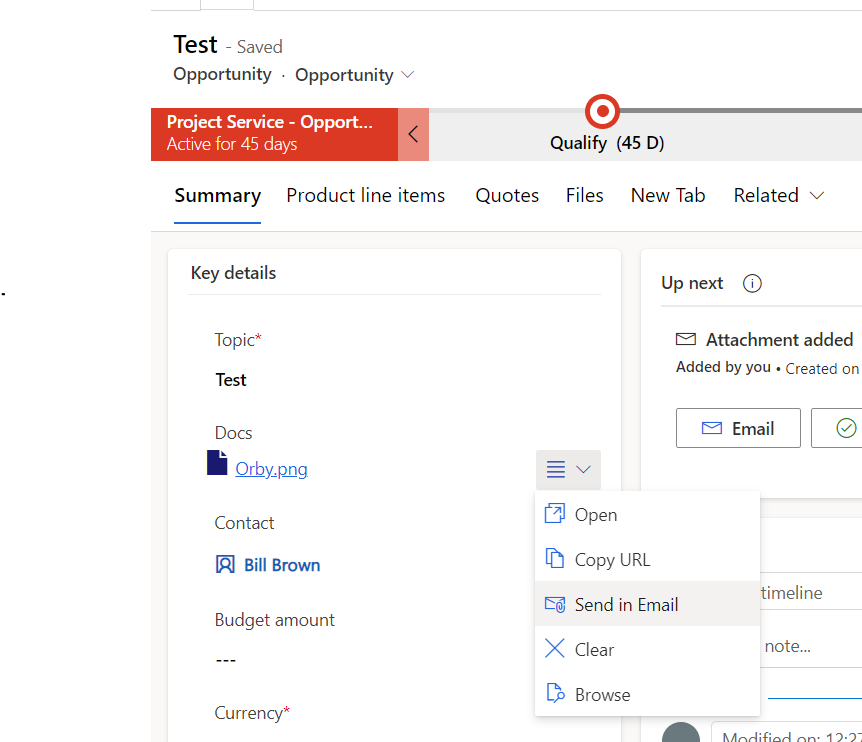
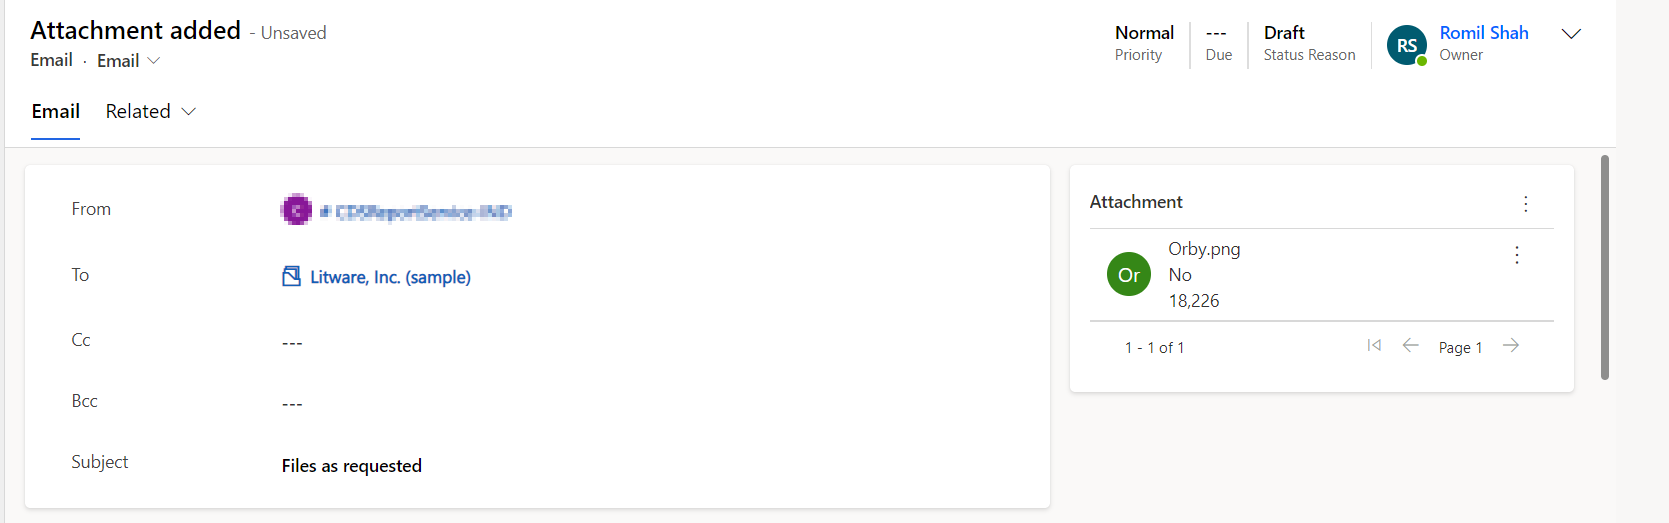
- Open the app, and navigate to the entity where the Document Browser for SharePoint PCF is configured, open the record, and click on the ‘Send in Email’ option as shown in the screenshot below:
- A pop-up window will appear to select the account (you may need to enable the pop-up if it’s not enabled already).
- After the account is selected a new ‘Email’ activity window will appear which will have field attached. Enter all the details and click on ‘Send’ to send the email.
By following these steps, you’ve successfully configured the email attachment feature using Document Browser for SharePoint PCF control on the form.