
Create a Power Pages Site login for an external user
If we want to allow external users to login to a Power Pages Site without adding them to our Active Directory and consuming an AD license, we can create them as Contacts in our Dynamics 365 or Power Platform Application.
This allows users to login to a Power Pages Site without the need to purchase Dynamics 365 or Power Apps user access licenses. These users have a Dataverse Contact record with a web Username and Password, but do not have an Azure AD login.
This method of logging into a Power Pages site is referred to as Local authentication. It allows users to:
- Register and log in using a username and password stored in the Power Pages system.
- Be authenticated via the ASP.NET Identity framework, not through an external identity provider like Azure AD or Google.
These users:
- Are represented by contact records in Dataverse.
- Have credentials stored in the Web Authentication section of their contact record.
- Can be manually created by admins or self-registered if open registration is enabled.
Authenticated User Licensing
Local authentication users are considered authenticated external users, even though they don’t use Azure AD or other external identity providers.
Licensing Model:
- Authenticated User Licensing in Power Pages is pooled, not assigned to specific contacts.
- This is typically priced at $200 USD per site for 100 authenticated users per month.
- Licensing is based on unique users per site per month, not on login frequency.
Configure Site Login
To allow external users to login to a Power Portal, we need to:
- Create them as a Contact Record so we can manage them.
- Either Set a Password to allow the Contact to login to the Site, or invite them to create their own Password.
- Configure the Site to allow Contacts (that are not AD users) to log into the site.
- Optionally – Assign a Web Role to the Contact so they can access protected pages.
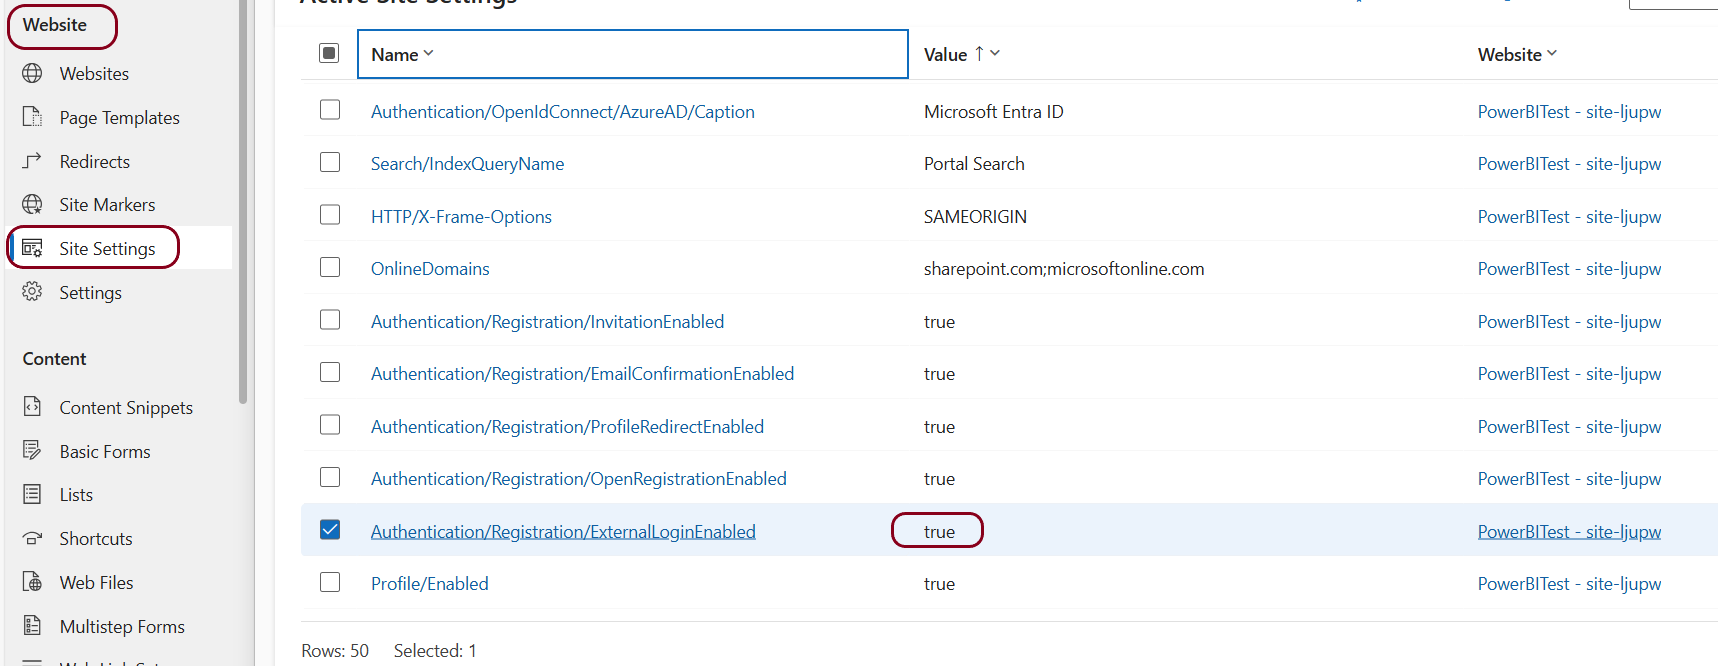
Configure the Site for External Login
- Open Power Pages Management
- Under Site Settings, set Authentication/Registration/ExternalLoginEnabled to
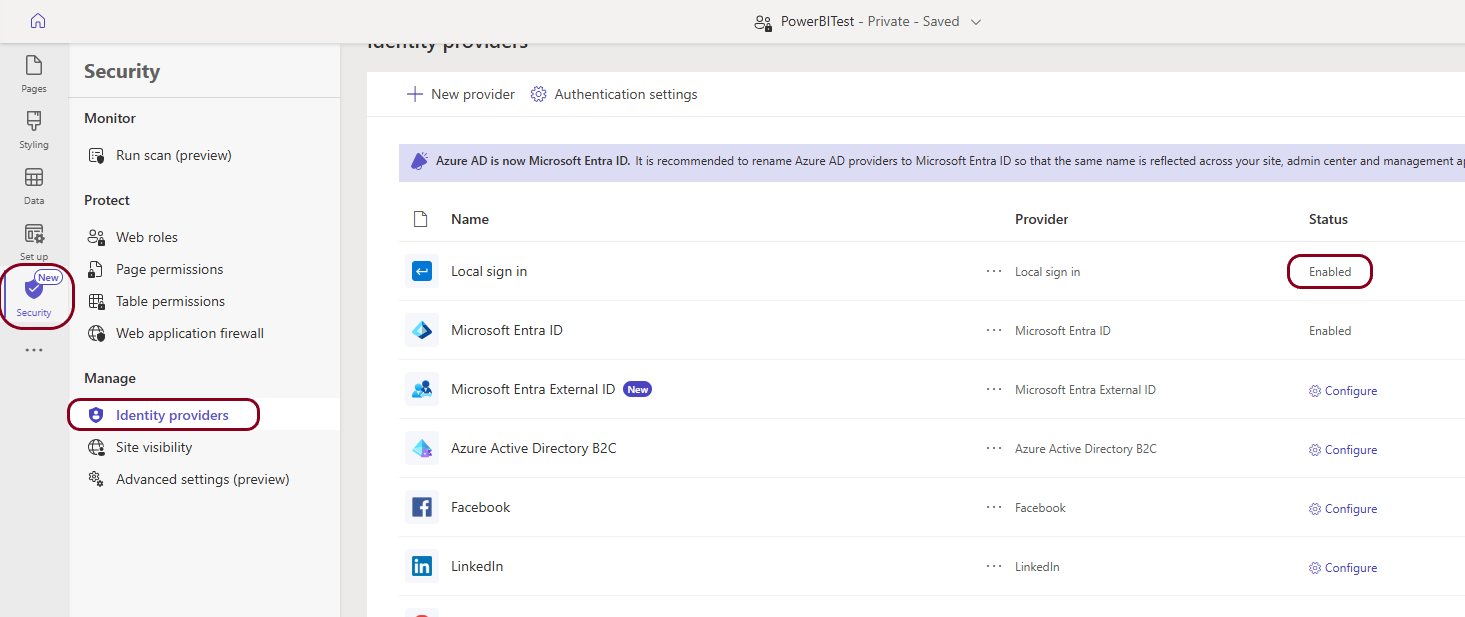
- Open Power Pages Design Studio
- Set Security/Identity providers/Local sign in to Enabled
Configure a Web Role (optional)
Web Roles help manage what pages and sections are available to logged in users.
- Open Power Pages Management
- Under Security – select Web Roles
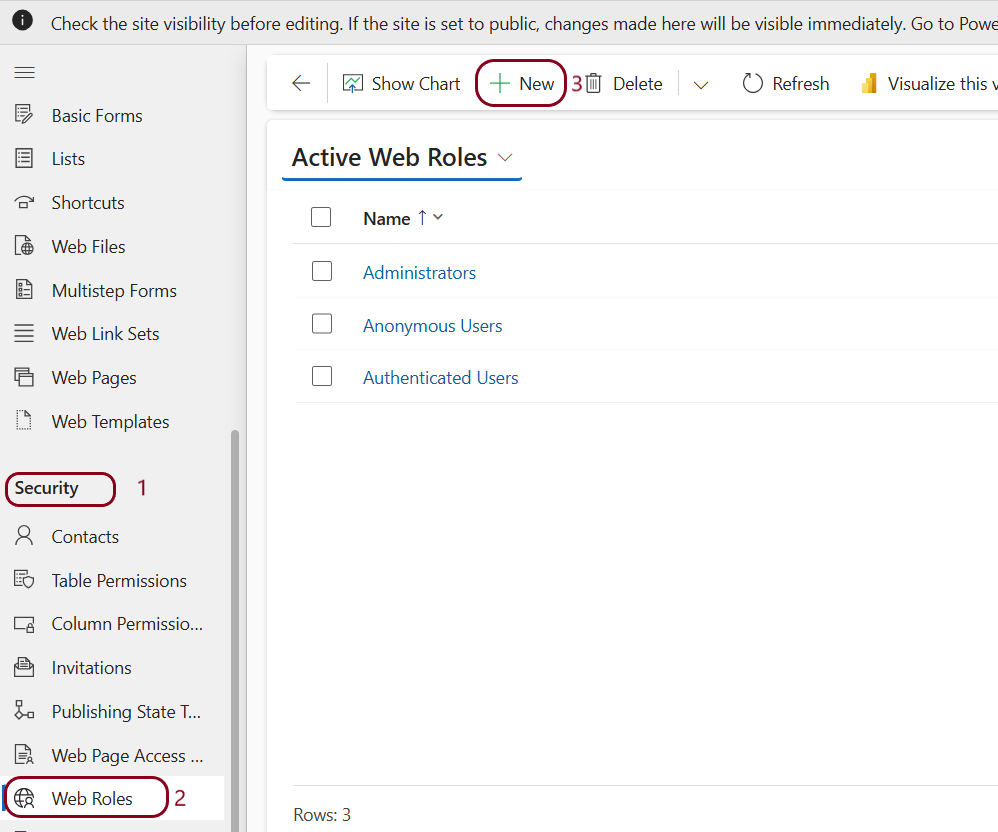
- Click on + New on the command bar
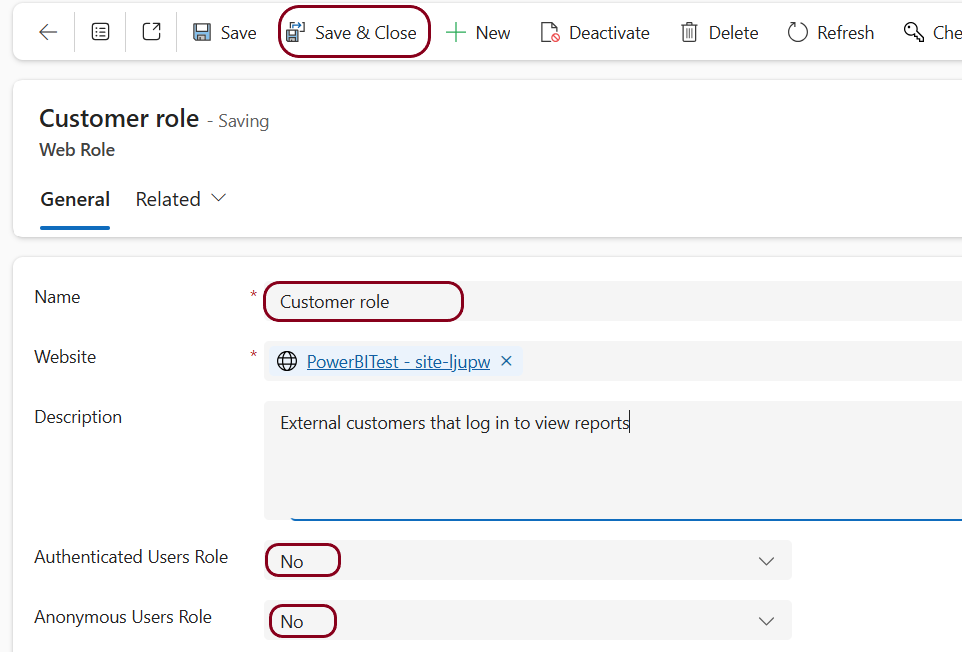
- Enter a relevant
- Select the Website.
- Provide a Description (not required but useful).
- We normally leave Authenticated Users Role and Anonymous Users Role set to No.
Save & Close
Contact records
Every external user must have a Contact record in our Dataverse database. Creating a Contact record is not covered in this article.
It may be useful now or later, to modify Power Page security that allows other people in the Contact’s organisation to see records in Power Pages. To enable this, assign the Contact to a valid customer Account (Portal Contact Form).
Configure Contact record
Setting Contact Web Role and Password
You can allow the external contact to set their own Username and Password by sending them an invitation.
Alternatively, we can set it manually and communicate the Username and Password with the customer.
Manual configuration of Contacts for Site Access
- Open Power Pages Management
- Click on Security then Contacts
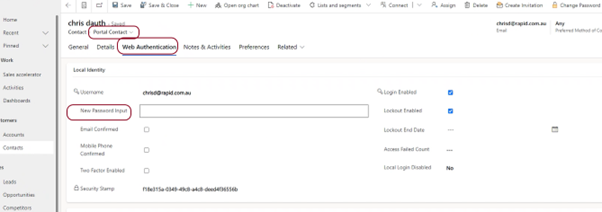
- Open the Contact’s record and open a Form that contains the New Password input You may have to edit an existing Form to ensure this field is visible.
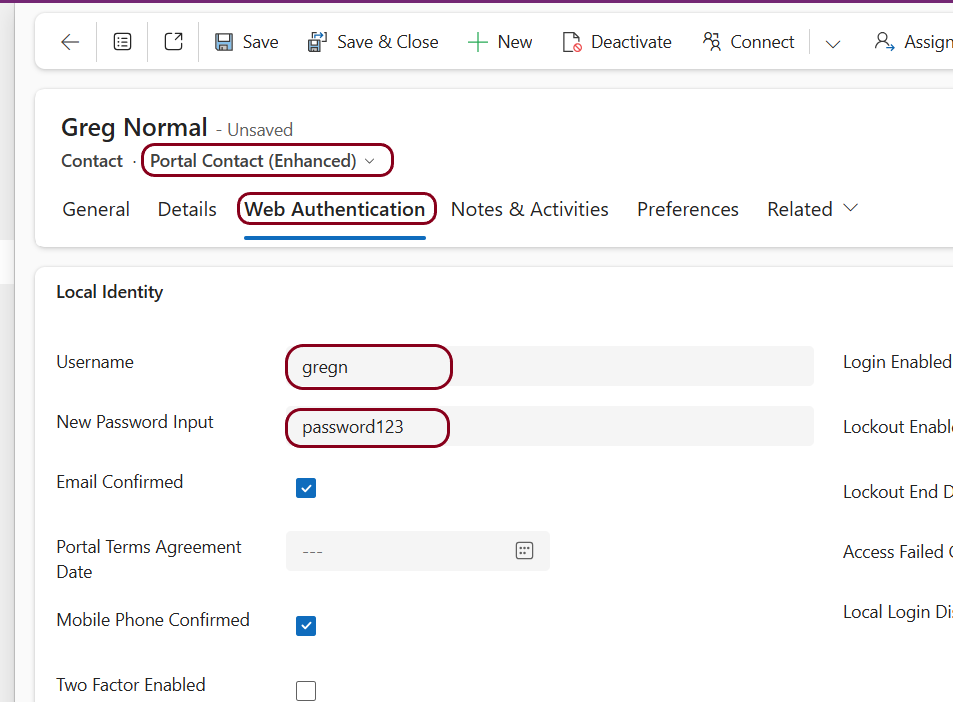
- Add a Username and set a New Password Input.
- Save & Close
- We need to manually notify the Contact of:
- The external Power Page Site address.
- The Contact’s Power Page Site Username.
- The Contact’s Power Page Site Password.
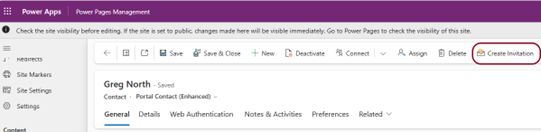
Invite a Contact to the Site so they can self-register
- Open Power Pages Management
- Click on Security then Contacts
- Open the Contact’s record and ensure the Contact has a valid email address.
- Click on Create Invitation
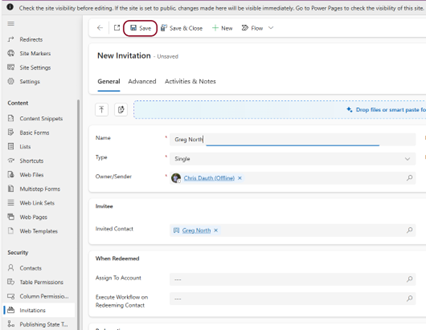
This will take you to the New Invitation page. The options here are described in detail in another article.
- For now, just click on Save
Now we want to Send the invitation to the contact so they can self-register.
- Click on Flow – Send invitation
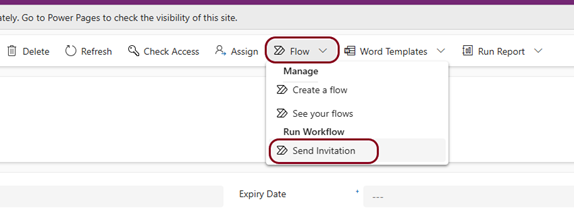
To check if the Flow has triggered and the email has been sent:
- Go to the Invitations page and select the Open Invitations (Enhanced)
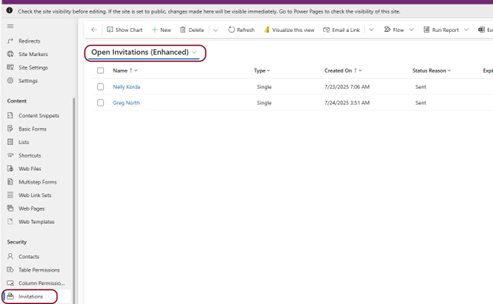
If the Status Reason is Sent, the flow has worked.
The Contact should receive an email that will allow them to self-register. This includes creating their own Username and Password.
Web Roles
Web roles in a Power Pages site are like permission blueprints that define what users can see and do once they’re logged in. They’re essential for managing access to content, data, and functionality across your portal.
Web Roles Apply To:
- Web Pages
- Control visibility and access to specific pages
- Can restrict content based on login status or user group
- Dataverse Table Permissions
- Define CRUD (Create, Read, Update, Delete) access to data
- Apply security trimming based on relationships (e.g., contact, account)
- Lists and Forms
- Determine who can view, submit, or edit forms and data lists
- Files and Web Files
- Restrict access to downloadable content or embedded media
- Portal Features
- Enable or disable access to features like search, profile editing, or admin tools
- Custom Logic and Workflows
- Trigger Power Automate flows or custom scripts based on user roles
Assigning Web Roles to a Contact (optional)
- Open the Contact record and select the Portal Contact (Enhanced)
- Select the General
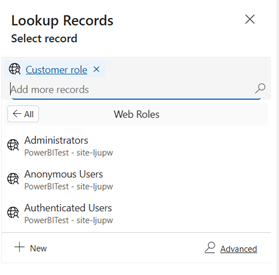
- In the Web Roles section, click on Add Existing Web Role.
![]()
- Select a Role and click on [ Add ] (bottom right).
To change a Users web login password
- Open the User’s Contact Record in a Sales App or Contacts section of Power Portal Management.
- Select a Form that contains the New Password input You may have to edit an existing Form to ensure this field is visible.
- Enter a New Password Input and Save. Make sure you record this password because you won’t be able to see it later.
- Communicate the new password with the Contact