Creating a Quick Campaign to send Emails to multiple Contacts
A Quick Campaign in Microsoft Dynamics 365 is a single campaign activity. It is used to send targeted communications such as e-mail blasts, mail campaigns, or phone call campaigns to specific audiences.
We can track the success of a quick campaign through Campaign Responses and convert positive responses into new leads, quotes, orders, or opportunities.
We can use Email Templates to improve productivity and ensure our corporate image is maintained.
The Email Templates can include dynamic merge fields that retrieve information from the Dynamics records in the Campaign. This will enhance the effectiveness of the campaign by personalising each individual message.
Creating Email Templates is covered in another article in Orby’s Blog. Remember that Email Templates only support Rich Text Content – not html.
Quick Campaigns can create email messages in html format but dynamic merge fields are not available using this method. This means we can send bulk html emails, but can’t personalize them.
Quick Campaigns start with either a list of Dynamics records in a View, or a Marketing List. Both methods take us through a wizard as outlined below.
The process is the same for both Dynamics 365 and Microsoft Model Driven Apps (Power Apps Premium license required ), so in this document we will use the term ‘Dynamics’.
Method 1. Select the audience from a list of Contacts
Start by selecting a View or searching Contacts for records that we want to include. After we retrieve the list, we can filter the audience even further by selecting records.
Below, we have selected a View (My Active Contacts) and selected some Contacts from this view.
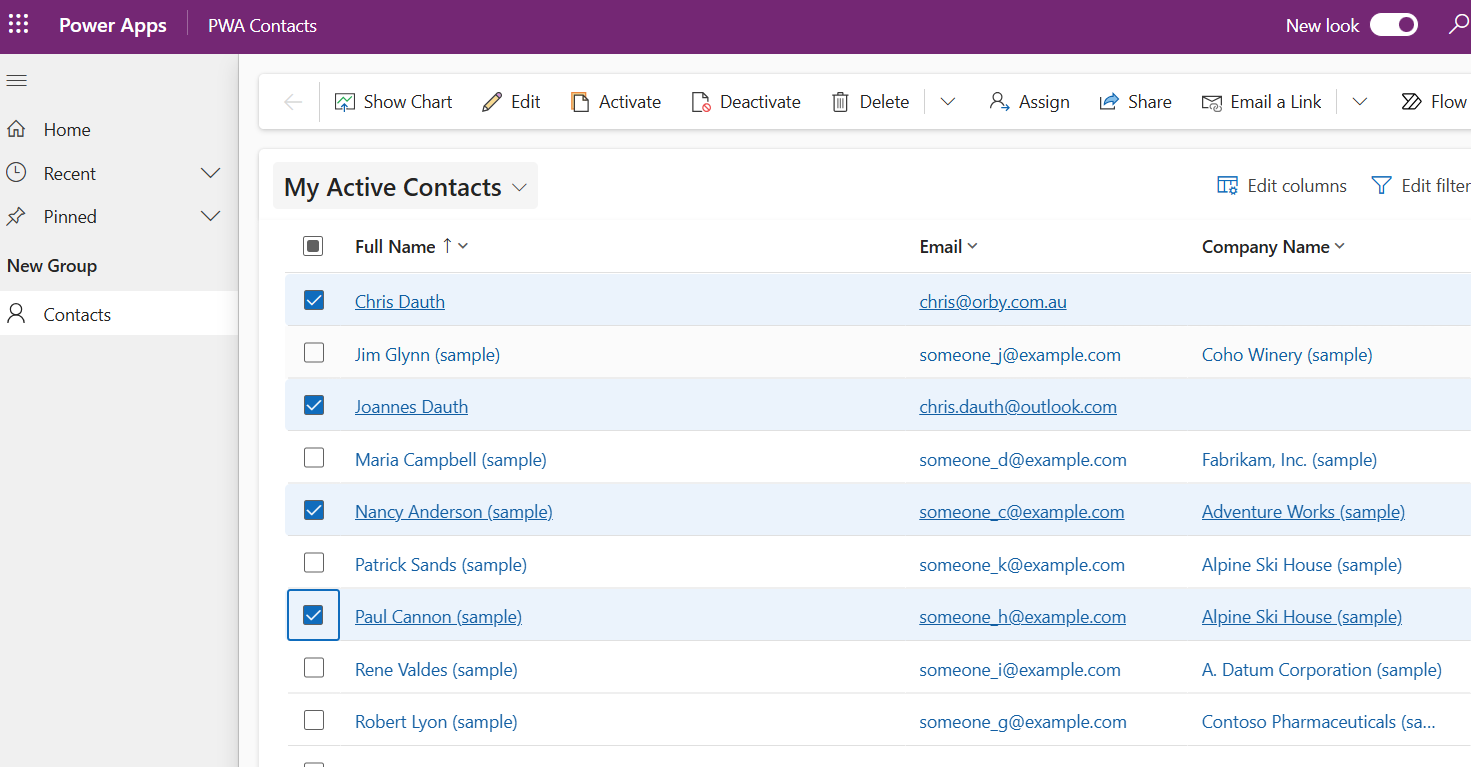
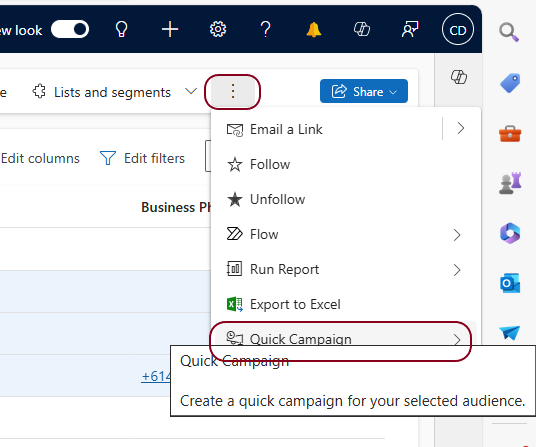
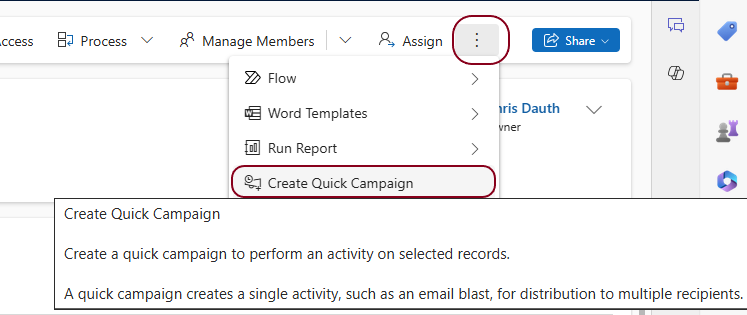
From the ellipses on the right-hand side of the command bar, click on Quick Campaign
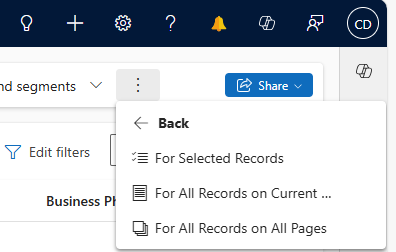
We get 3 options.
|
Option |
Description |
|
For Selected Records |
The records on this page that are selected (ticked) will be included |
|
For All Records on the Current Page |
All the records on this page will be included. The page size (number of records on one page) can be modified in our personalization settings. |
|
For All Records on All Pages |
If there are more records retrieved than the page size limit, every record on every page will be included |
For this example, we will select For Selected Records
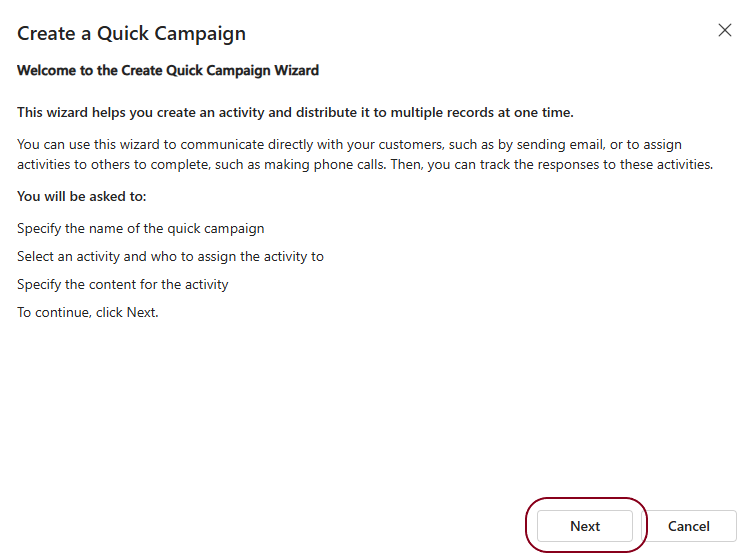
The next page is purely instructional so click on [ Next ]
Specifying the Campaign Name
The rest of the Quick Campaign process is common to:
- Method 1. Select the audience from a list of Contacts above and
- Method 2. Send to a Marketing List below
Type in a Name if this is a new Campaign, or select a Campaign from the list, if this Activity is part of an existing Campaign.
This is a new campaign so I will give it a Name and click on [ Next ]

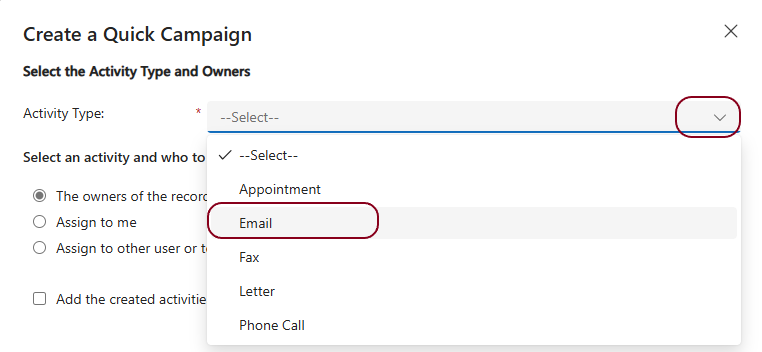
This is an email campaign, so for the Activity Type we will select Email.
Assigning activities will add an entry in the Activity list belonging to a User or a Team. We should encourage Users to frequently check their own Activity list, and the lists of Teams that they belong to.
|
Option |
Description |
|
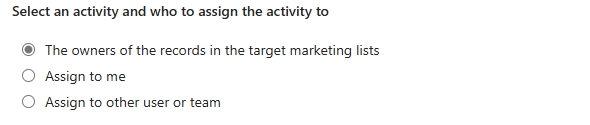
The owners of the records in the target marketing lists. |
This is the system user who owns the record. |
|
Assign to me |
We may do this if we are the Marketing Manager and want to follow up the activities yourself. |
|
Assign to other user or team |
We want the activities to be added to another list. |

Add the created activities to a queue means that when we create a quick campaign activity (such as an email blast, phone call, or appointment), the system automatically adds these activities to a designated queue. This helps organize and manage the campaign-related tasks efficiently. For example, if we were running a phone call campaign, the completed phone call activities will be added to the specified queue for follow-up or further action.
Leave this unticked unless you use queues.
For Email Activities we have the option to Mark email messages to be sent.

Leave this as selected because we want the emails sent immediately.
Click on [ Next ]
Specify the content of the Activity
For Email Activities, the content can be:
- Imported from and Email Template,
- Edited the Quick Campaign Designer, or
- Created by pasting html.
If we want to paste html, we should have the html page already created, formatted and styled. We can edit the html later but you need advanced html skills to do this.
To use an Email Template, Click Use Template [ ]
![]()
And select a Template from the list
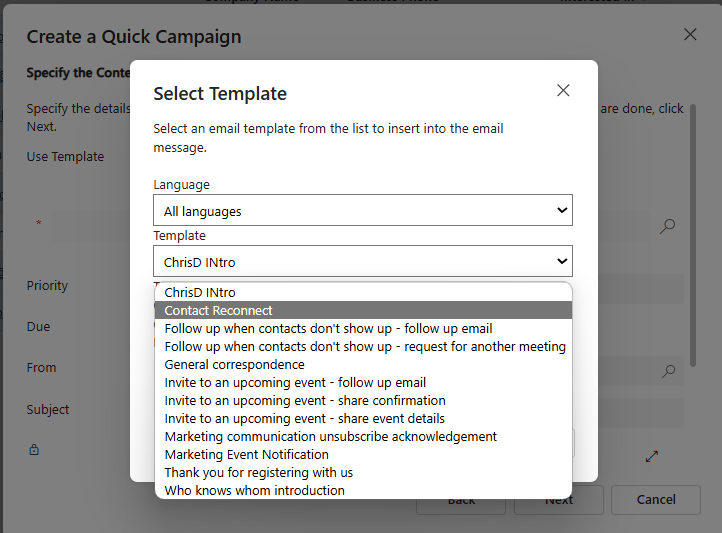
If you select a Template, the Designer will be locked and you can’t edit the Body or the Subject of the email.
If we haven’t selected a Template, the Designer will be available.
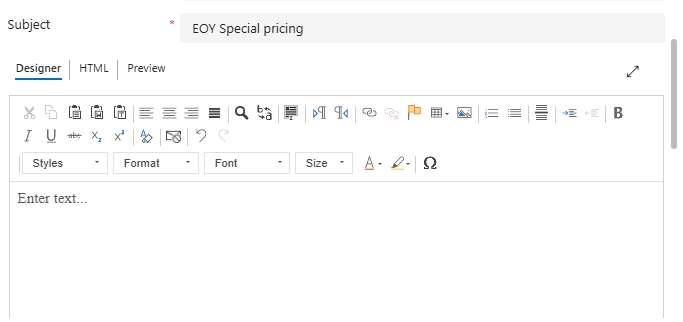
This is the same designer as the Email Template designer. You can format Rich Text, add Images etc.
You can preview what the message will look like on different devices by clicking on Preview.
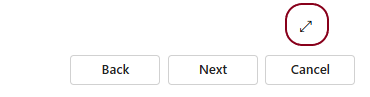
To insert html, scroll down to view the Designer. To expand the Designer, click on the expand icon in the bottom right hand corner,
The html content window will be visible/open so you can paste your html code.
Click on HTML,
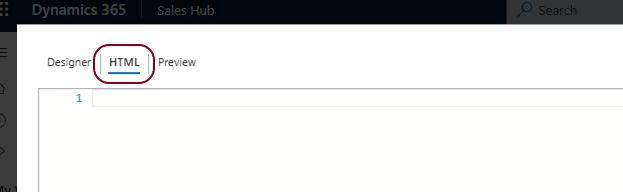
And paste the html code we have created.
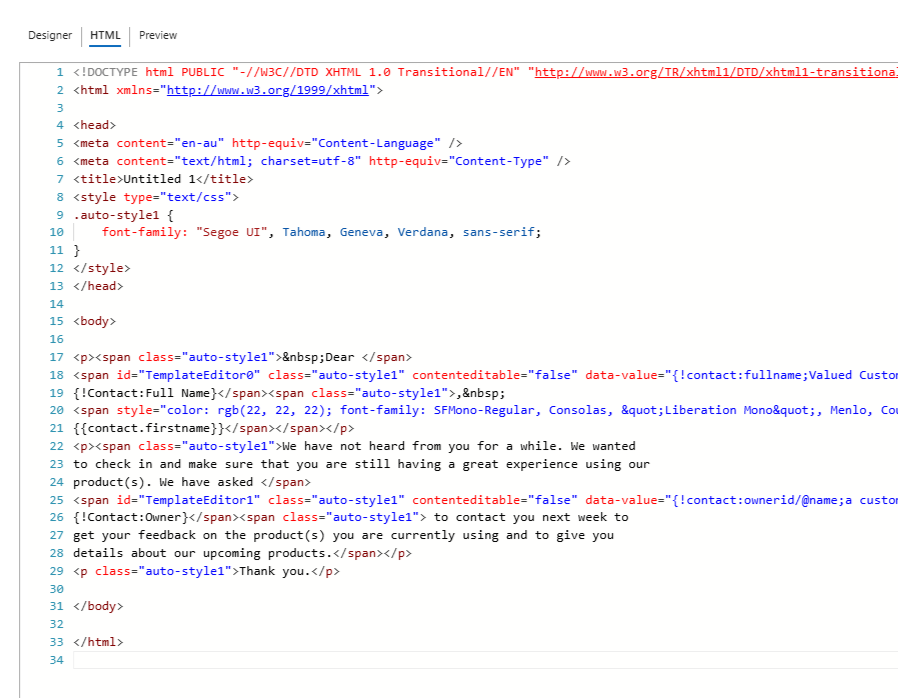
We check what the how the html will be displayed by clicking on Preview.
You can edit the html in the HTML window but this requires advanced html editing skills. Always switch to Preview after making changes.
We recommend that you do all your editing in a wysiwyg designer and paste the code here.
Click on Preview to see what it will look like on different devices

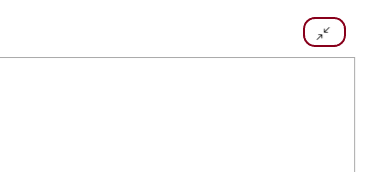
Close the expanded screen by clicking on the 2 arrows in the top right-hand corner.
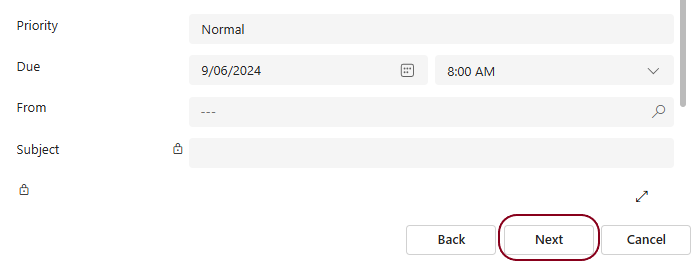
We can set the campaign to launch at a specific time by setting the Due. Leaving this blank will set the emails to be sent immediately.
Setting the Priority to High will set the Importance of the email to High.
Select who you want the email to come From. If you leave this blank, the From will be the current Dynamics user. The From will determine who a Reply goes to so you may prefer the From to be someone else (e.g. Marketing Manager) or a Queue.
If you have selected a Template for this campaign, the Subject will be locked. Otherwise, enter a Subject and click [ Next ]
A summary screen will give us a chance to go back. If we are happy with what we have done, click on [ Create ]
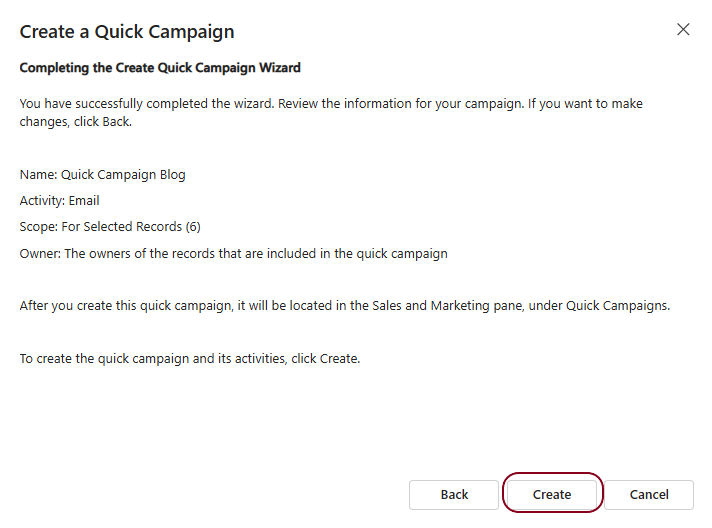
The emails will be sent or added to a queue if you selected one earlier.
Method 2. Send to a Marketing List
We can launch a Quick Campaign to a Marketing List to bypass the record selection step of the previous method.
A Dynamics 365 Marketing List is a powerful tool for managing groups of potential or existing customers within the Dynamics 365 ecosystem. Here are the key points:
Types of Marketing Lists:
- Static Marketing List: You manually add and update members. Use this when you want to control the list membership directly.
- For Static Marketing Lists, you can:
- Add members using lookup or advanced find.
- Remove members using advanced find.
- Evaluate members using advanced find.
- Note: Only active records can be added to static lists.
- Dynamic Marketing List: Members are added dynamically based on search criteria you set. For example, you can create a dynamic list to target members from a specific city. The list updates automatically when needed.
Dynamic Marketing Lists update automatically based on criteria, so you don’t need to manage members manually.
To launch the Campaign
From the Dynamics Site Map, click on Marketing Lists.
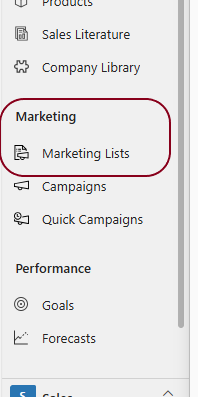
This is accessible in the Site Map of the Sales Hub app in Dynamics 365 Sales. If we are using a Model Driven App, we may have to ask our administrator to add this option to the Site Map for us.
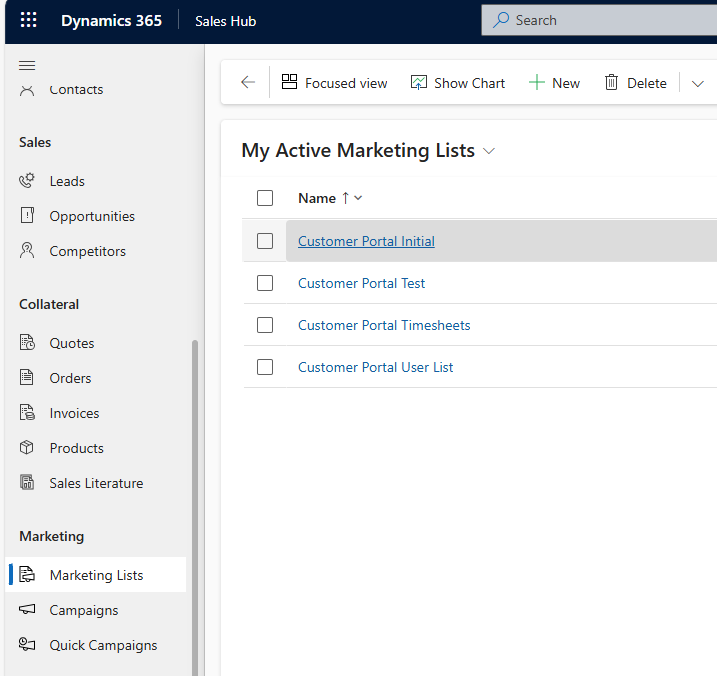
Open the list you want to work with.
From the ellipses on the right-hand side of the command bar, click on Quick Campaign
The rest of the process is outlined above in Specifying the Campaign Name above.
Analysing Campaign responses in outlined in a separate article in the Orby Blog section and worth looking at.
We hope this article helps and … happy campaigning!