
Mapping Microsoft Dynamics 365 Fields between Tables
Mapping Microsoft Dynamics 365 entities (tables) allows you to automatically create a direct relationship between fields in related entities. This mapping relationship automatically updates selected fields to save time entering duplicate data.
Key Use Cases for Table Mapping
- Sales: Link Opportunities, Contacts, and Accounts to track the sales pipeline and customer interactions.
- Customer Service: Connect Cases, Knowledge Articles, and Customers for efficient issue resolution.
- Field Service: Associate Work Orders, Resources, and Assets for managing on-site services.
- Finance: Relate Invoices, Orders, and Products for financial tracking and reporting.
An example of where you might use field mapping is relating a field in the Invoice table with a field in the source Quote table. This means that when the Invoice is created, the data from the source Quote Record is automatically transferred to the corresponding field in the newly created Invoice record.
Many fields are already mapped when Dynamics is installed. An example of this is converting a Lead to an Opportunity where most of the data from the originating Lead is transferred to a new Contact/Opportunity.
Manual mapping allows you achieve the same automation with non-mapped system fields, or custom fields that you create yourself.
Here’s are some reasons why mapping Dynamics 365 tables is useful:
Enable Data Relationships
- Interconnect Data: Mapping links records from different tables, allowing you to define relationships like one-to-many, many-to-one, or many-to-many.
- Example: Linking Accounts to Contacts ensures you can track all contacts associated with a particular organization.
- Streamline Navigation: Easily navigate between related records through lookup fields and subgrids.
Improve Business Processes
- Automate Workflows: Relationships allow workflows and Power Automate flows to reference related data, automating tasks like record updates, notifications, or data synchronization.
- Example: Automatically update a Contact’s information when their associated Account changes.
- Data Validation: Enforce data integrity by creating dependent relationships, ensuring related records are created or updated consistently.
Enhance Reporting and Analytics
- Unified Views: Relationships enable the creation of unified views and dashboards by aggregating data from related tables.
- Example: A sales manager can view an Account’s total revenue by combining data from Opportunities and Invoices.
- Advanced Insights: Relationships make it easier to analyze trends and patterns by connecting relevant data points across the system.
Simplify User Experience
- Intuitive Interfaces: Mapping tables allows Dynamics 365 to automatically generate lookup fields, subgrids, and forms for related records.
- Example: Users can select a parent Account for an Opportunity from a dropdown (lookup) without manually entering redundant data.
- Quick Access to Related Data: Subgrids display associated records (e.g., activities for an Opportunity), reducing the need to switch between tables.
Ensure Data Consistency
- Eliminate Redundancy: Avoid duplicate data entry by referencing related records rather than recreating them.
- Example: Instead of duplicating customer details in every Order, link the Order to the Customer table.
- Cascading Actions: Control how changes in one table affect related tables, such as cascading updates or deletes.
- Example: Deleting an Account can cascade-delete all related Contacts.
Support Integration and Customization
- API and Integration Readiness: Mapped tables are easier to integrate with external systems via APIs, as relationships ensure the right data connections.
- Custom App Development: Relationships provide a foundation for building custom apps in Power Apps that leverage Dynamics 365 data.
- Example: Create a custom project management app linking Tasks, Projects, and Employees.
Optimize Data Security
- Role-Based Access Control: Relationships enable granular control over who can access or modify related records.
- Example: Only allow users to see Contacts linked to Accounts they manage.
Mapping establishes meaningful relationships between different datasets, which improves data organization, usability, and functionality within the platform.
By mapping Dynamics 365 tables, you create a robust and interconnected system that maximizes productivity, supports decision-making, and delivers a seamless user experience.
How to Map Fields
Preparation
- First identify the Source and Target entities that need to have a field mapped.
- Then identify the fields in the Source and Target tables. These fields must have the same name and attributes.
- If they are Lookup fields, they must lookup the same table.
- If they are Choice fields, the Optionset values must be the same.
Process
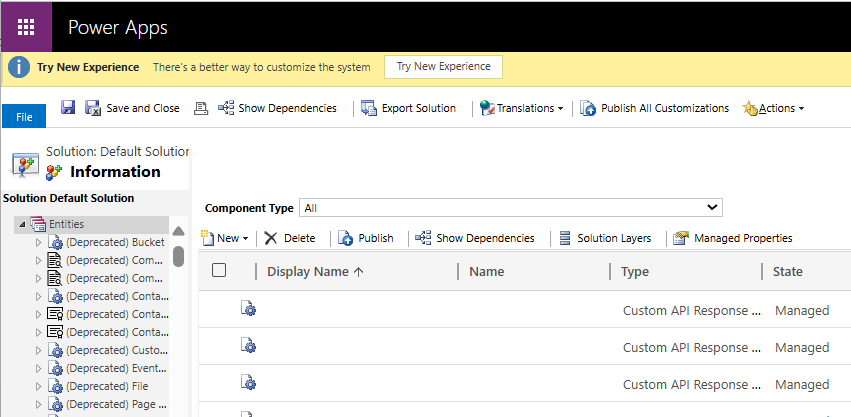
- Open Power Apps and go to Advanced Settings.
- Click on Settings then Customisations/Customization.
- Click on Customize the System.
Click on Entities to expand the list.
- Then select the Source Entity to expand options. In this case we are selecting Quote.
- Then select 1:N Relationship.
- If a 1:N Relationship doesn’t exist between the Source and Target entities, you will need to create one. This can be done from the screen below by clicking on New: 1-Many Relationship in the top left hand corner.
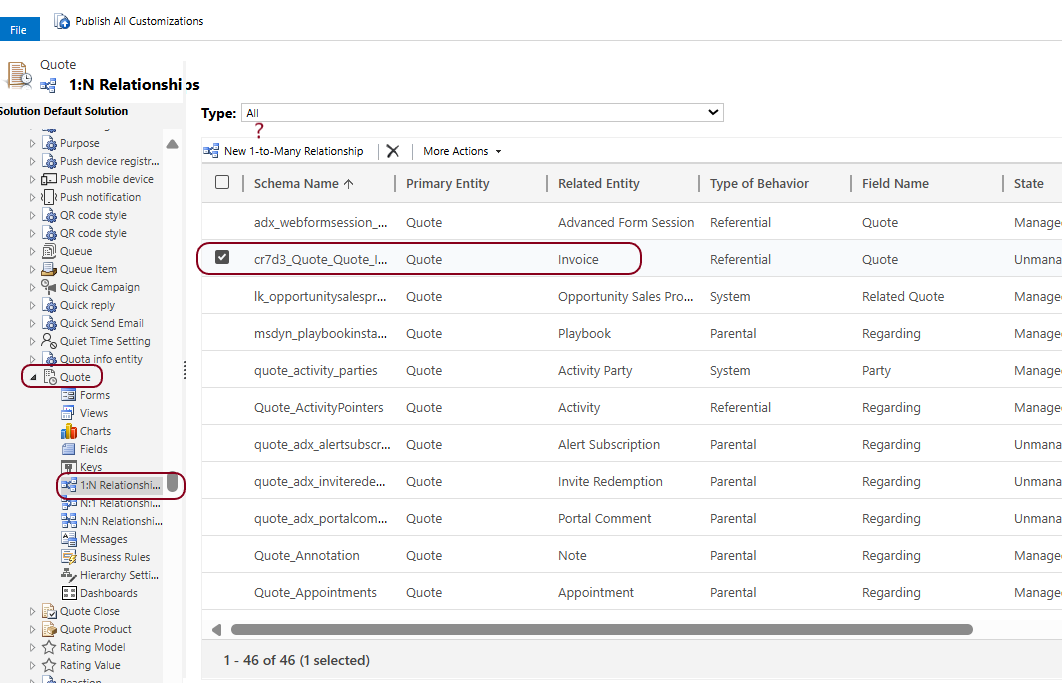
- Then select the Row with the Target Entity in the Related Entity In this case it is Invoice. The Relationship window will open.
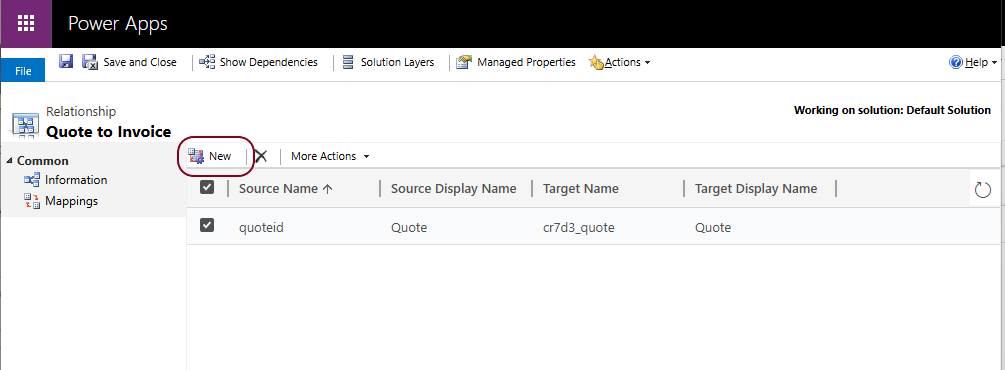
- Click on Mappings and the mappings for this relationship will be listed.
- To create a new mapping, click on New
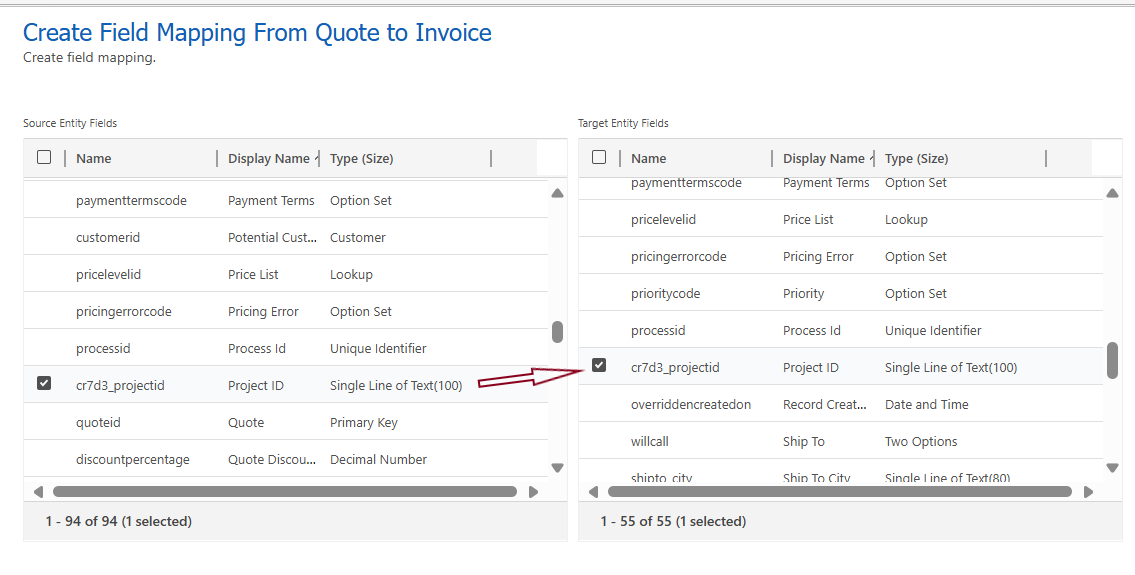
- Now we want to map the Quote Custom field Project ID to the Invoice Custom field Project ID. Check the corresponding items in the Source Entity Fields and the Target Entity Fields
- Click on [ Save ]
- Back in the Relationship window, click on [ Save and Close ].
- Back in the Information window, click on [ Publish all Customizations ] then [ Save and Close ].
Now, when an Invoice is created from a Quote, the Quote Project ID will transferred to the Invoice Project ID field.
Please Note: The Quote Custom field Project ID has exactly the same properties as the Invoice Custom field Project ID.
We hope this helps and if you have questions, or require assistance, please don’t hesitate to contact us at support@orby.com.au.